“Whoooopie!” Oh, so sorry! I thought I was alone. Much like the Amish farmers rumored to be the recipients of the original whoopie pies, I just can’t conceal my delight when I’m offered one of these treats. This recipe makes the quintessential whoopie pie. The cake is moist, chocolate-y, and dense. The filling is creamy, fluffy, and decadently sweet. If our friend D. Bunnyhunter hadn’t stopped by and taken it when he did, The Angry Chef and I may have come to blows over the last one. (Phew! Thanks, man!)

Whoopie Pies: Here, there, and everywhere
Just like the ubiquitous cupcake, whoopie pies have been popping up all over the place lately—in all sorts of flavors. I’ve seen the cream-filled saucers piped full with everything from chocolate to maple buttercream.
Case in point: A quick Google search of “gourmet whoopie pie” this morning gave me more than 12,000 hits. The first page of results includes a mouthwatering parade of boutique bakeries who happily turn out the treats in dozens of flavors.
While they all have a certain drool-worthy note to them (hello, Espresso Chocolate Chip!), call me a purist: I prefer old-fashioned whoopie pies. Chocolate cake. Fluffy white filling with a hint of vanilla. Period.
And that’s just what this recipe will give you.

Like the Old-Fashioned Butterscotch Cookies I made recently, this recipe comes from my friend Joyce’s grandmother.

Let me tell you, that lady knew her way around the kitchen. They’re just amazing.

Monster pies vs. mini pies
This recipe makes 6 absolutely monstrous whoopie pies. You need two hands to eat one and you’ll feel at least moderately guilty if you finish one in a sitting. Each cake is about 2 heaping tablespoons of batter.

For a daintier treat, use 1 tablespoon of batter (or less) for each cake. The baking time will be slightly shorter, so keep an eye on them when they’re in the oven.
Fluffy whoopie filling
Like I said, I’ve seen all manners of whoopie pie fillings lately. Joyce’s grandmother used a combination of good ole Marshmallow Fluff, margarine, powdered sugar, and vanilla. (I swapped butter in for the margarine.)

If you’re inclined to have some good, sticky fun with sugar, you can always make your own fluff (click here for my step-by-step marshmallow tutorial…it’s easier than you think!).
Making homemade marshmallow fluff
Alrighty, then. Let’s make some whoopie! (Sorry, I couldn’t resist.)
Classic Whoopie Pies
For the cake
2 cups flour
1 tsp. baking soda
1/4 tsp. salt
1/3 cup unsweetened cocoa
1 cup sugar
1 egg
1/3 cup olive oil
1 tsp. vanilla
3/4 cup milk
For the filling (double the recipe if you want a super-thick filling)
1/2 cup butter (that’s one stick)
1 cup powdered sugar
3 heaping Tbls. marshmallow fluff
1 tsp. vanilla
Yields 6 monster-sized whoopie pies, or 12 smaller ones
For monster-sized whoopie pies: Use 2 Tbls. batter per cake
For medium-sized whoopie pies: Use 1 Tbls. batter per cake
Preheat your oven to 350 degrees. Line 2 sheet pans with parchment paper or silicone baking mats. Set aside.
Make the cake batter for the whoopie pies
Put the flour, baking soda, salt, cocoa, and sugar in the bowl of your mixer (or a large mixing bowl, if you’re using a handheld electric mixer).

Beat quickly to combine the ingredients.

Add the egg, olive oil, vanilla, and milk.

Beat on high to combine. You want to mix it until the batter just comes together uniformly—then stop. (Beating it too long will encourage gluten to develop in the batter, which will ultimately lead to a cake that’s less tender.)

It should look about like this:

It will be fairly thick.

Bake the whoopie pie cakes
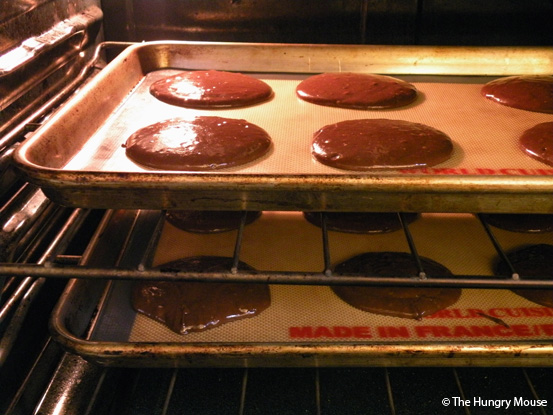
Grab your prepared pans. Drop 2 tablespoons of batter in a puddle on the pan. (If you’re making smaller whoopie pies, only use 1 Tbls. of batter.)

Give it a sec. It will flatten out a little, like this:

Repeat with more batter until both your sheet pans are full. Leave an inch or two in between each cake to give them room to poof up.

Pop the cakes into your preheated oven. Bake at 350 degrees for about 12 minutes.

How can you tell when the cakes are done?
Good question. They should look firm and be an even brown color.

When you press lightly in the center of one, the indent your finger makes should spring back and disappear. (If the indent remains, pop them back in the oven for another minute.)

You could even do a toothpick test, if you like.

Let the cakes cool for 5 minutes on the pan, then transfer them to a rack to finish cooling.

The bottoms should be soft—not crisp—and look cake-y, like this:

Repeat with the rest of your batter until you’ve used all your batter. While your cakes are cooling, make the filling.

Make the whoopie pie filling
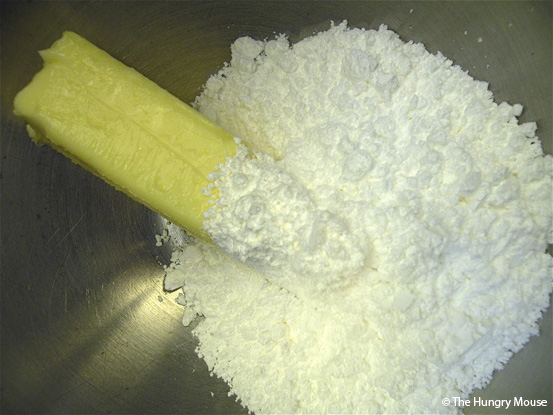
Put the butter and powdered sugar in the bowl of your mixer (or a large mixing bowl, if you’re using a handheld mixer).

Toss in the vanilla.

And the marshmallow fluff. The fluff measurement is approximate. It’s incredibly sticky stuff to try to measure precisely. If you add a little more or less, that’s just fine.

Beat on high for a few minutes. At first, the mixture will be really powdery and clumpy. After a minute or two, the butter and the fluff will loosen the whole thing up and you’ll see it start to smooth out.

Beat it until the mixture is smooth, fluffy, and uniform, like this:

It will be really thick, and should stand up in relatively stiff peaks, like this:

Assemble your whoopie pies!
This is my favorite part. It’s important to wait until the cakes are completely cool (or else they’ll start to melt your frosting, and you’ll wind up with a mess.)
Grab 2 cakes that look like they’re about the same size.

Stick them together quickly to be sure one isn’t a lot larger than the other.

Set the cakes bottom up on the counter. Put a few large dollops of filling on one cake.

Spread it around so it’s relatively flat. Don’t spread the filling quite to the edge of the cake.

Set the other cake on top of the filling.

Gently press down on the cake to smoosh it together a little.

This should force the filling to the edges.

Repeat with the rest of the cakes, until you’ve assembled all your whoopie pies.

Store them at room temp, in between pieces of wax paper, for about 3 days. If your kitchen is on the hot side, keep them in the fridge. Let them come up to room temp before serving.

Enjoy!


