Years ago now, I used to hang around a little cafe that a friend of mine owned.
One day, she charged me with keeping an eye on a couple of cakes that were in the oven. Easy as pie (err, cake), right? The batter was made. I just had to yank them out when they were ready.
“Sure thing,” I chirped. “How long do they bake?”
Her response?
“Bake them ’til they’re done.”
Oh. Of course.
As silly as it sounds, a lot of older recipes that I have from my mother, my grandmother, and my grandmother’s friends (you know, the ones scribbled on the back of an envelope) end with those exact words.
Ask any professional cook or chef for recipe advice, and they’ll likely say the same thing.
Baking a cake doesn’t have to be hard. You just need to know what to look for.
Use all your senses when you cook
Now, don’t get me wrong. Precise and exact baking or cooking directions are important.
That said, it’s also really helpful to develop a good sense for the clues that your food gives you as it cooks. Trust your recipe, thermometer, and kitchen timer, for sure, but also trust your instincts.
This is exactly why I rarely use a meat thermometer anymore when roasting a chicken, and why I use a recipe’s baking time as a guide, not a golden rule.
Usually, I rely more heavily on my eyes, nose, and sense of touch, because baking times can vary. In the end, they can depend on a bunch of factors, including:
+Your individual oven (does it have hot spots?)
+The weather (is it really humid?)
+The size and material of your pan (is it glass or darker, non-stick?)
+The moisture content in your ingredients (are they older and a little drier?)
All of these things can be slightly different each time you cook. Learn to trust your senses, and you’ll react better on the fly.
General guidelines for testing a cake
These are meant to be general guidelines. Always start with your original recipe. If your cake has any particular quirks, they’ll hopefully be mentioned.
For example, a toothpick test will never work on a molten chocolate cake, which is moist in the center even when it’s done.
As a general rule, a cake is done when:
+A toothpick inserted in the center comes out clean (visual explanation below)
+The top feels springy. Just press on the surface of the cake with your finger. If the indentation springs back and disappears, the cake should be done.
+The cake is evenly browned and pulls away slightly–but not too much–from the sides of the pan.
The toothpick test
This how my mother tests a cake, and it’s how my grandmother did as well. I’d wager that’s the same for a lot of you.
Ladies and gentlemen, check your cakes!
Grab a toothpick.
When you think your cake is close to being done, pull it out of the oven.
Insert a toothpick into the center of the cake.
Pull it out. When it’s fully baked, there won’t be any wet batter on it.
Not done
If it’s sticky and moist like this, your cake isn’t done yet.
Stick the pan back in the oven for a few more minutes, then repeat the test.
This is looking more solid, but it’s not done yet.
Again, stick it back in the oven for another few minutes, then retest.
Done!
And…voila! When the toothpick comes out clean, or with a few crumbs (that look like regular cake crumbs) clinging to it, it should be done.
My favorite toothpicks
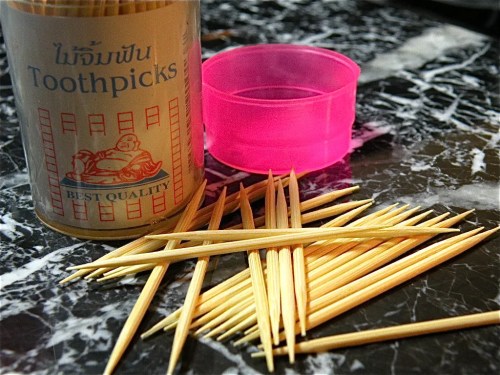
I get my toothpicks at my Asian market, where they come in this nifty little shaker.
I like them particularly because the lid makes them harder to spill when I’m trying to grab one using only one hand.
But…do I have to use a toothpick?
Not at all. There is totally a “toothpick-less” toothpick test.
I use toothpicks because I usually have a bunch of them in the kitchen. And I don’t mind using a few each time I make a cake.
But, in the spirit of full disclosure, you should know that you can also buy a reusable, stainless-steel cake tester like this Oxo model for a few bucks.
You can also use an Amish Cake Tester Broom. Just break off one of the corn-husk straws and test away.
Happy baking!


